Goodbye Plastic Water Bottles!

So have you ever thought twice about using plastic bottles? In this day and age, it's pretty common to get your water from plastic bottles. I know I thought they were "healthier" than tap, and although it cost quite a bit to buy all those bottles, I felt "green" because I would re-use my bottles for several days, and when I was done I would always recycle them. Good green girl right? Well apparently not. After reading some books and watching the two videos below, I had an inkling my watter bottle habits were actually the opposite to being green...they were harming the earth and possibly my body!

Here are the two videos that inspired me to drop plastic water bottles:
First up, the movie Tapped, which, "...examines the role of the bottled water industry and its effects on our health, climate change, pollution, and our reliance on oil." It comes to DVD on Netflix on August 10, 2010. Sweet, it's been on my Queue for months!


The next video is called, The Story of Bottled Water which, "... employs the Story of Stuff style to tell the story of manufactured demand—how you get Americans to buy more than half a billion bottles of water every week when it already flows from the tap."


So several months ago I was able to cut my plastic water bottle habit and replace it with a reusable aluminum water bottle from Sigg, which cost about $28. I was really digging these water bottles for awhile because you could choose from thousands of designs on CafePress.com and they kept me from wasting plastic water bottles. But then I read about how Sigg was charged with having BPA in their bottles back in 2008, so it was time for a switch. On top of this possible BPA contamination, the inside of the bottle always looked kind of weird, and it was hard to clean (see those grooves on the top of the bottle...this lining was peeling off at one point- yuck!).

Anyways, after researching once again I discovered the awesome stainless steel Klean Kanteen, the water bottle that so many books would reference when speaking of a healthy alternative. I loved how the stated up front on their website that their products are BPA free, thank you for that! So after purchasing two of these (one for my hubby), I've been pretty pleased with them. They are much easier to clean and don't get a funky rusty smell after a few days (like the Sigg used to). Also, the inside is smooth and shiny, not some faded looking coating. One downfall, I got the biggest size (a 40 oz which cost $25.95) and it gets a little tricky to drink while driving...usually I end up with water down my shirt if I try! A different top would probably help with this, instead of the kind that you twist to put on and take off. Aside from this, I'd love to try and get a small one next. Here's some other really cool ones I have on my "Green Things to Buy List":
Well, I hope this has given you some ideas of how you can ditch those plastic water bottles and lessen your impact on the environment, your wallet, and your body! Do you guys use any reusable water bottles already or other plastic water bottle alternatives? What's your favorite type or brand? Let me know !

By the way, here's my husband's Klean Kanteen water bottle which he covered with some skateboarding stickers, just so you can see that not all reusable water bottles have to be frilly and pink! He he!

Dear Baby J...

Dear Baby...

Congrats on dominating Month 7!  You are one big boy in there; almost up to your total birth length by now, and working hard to gain weight.  For some reason, I feel like you are going to be a tank.  Your daddy and mommy were both around 7 pounds, so I'm hoping you don't exceed much more than that.  It's pretty amazing to actually feel you getting bigger in there.  I know you are starting to run out of room.  I know this because I'm starting to feel body parts pushing into places I never expected.  It's an insane feeling and I'm not going to lie, a little uncomfortable at times.  I'd ask you to kindly remove your foot from my ribs; however, I am aware that you are indeed a boy, and that boys sometimes have a difficult time taking direction from others, especially women.  Although this foot of yours takes my breath away every now and then (and I'm not talking the 'Top Gun' type), I realize you are just as, if not more, uncomfortable as your momma and I would much rather have you moving and kicking than not.  Yesterday, I hardly felt you move and that, combined with crazy pregnancy hormones, was enough to make me go a little crazy. 

Speaking of crazy pregnancy hormones, my mind has been a little all over the place this week.  After an incredibly relaxing Sunday at home in the hammock, my week should have been set.  But with three weeks until I greet my students for another school year and about nine weeks until I meet YOU, I was feeling anything but relaxed.  Can you believe my 'What to Expect' book actually recommends I start packing my hospital stay bag?!?!  What on earth do I need at the hospital?  How do I find you a pediatrician?  How do I find a longterm sub?  What on earth are disposable underwear?  Questions like these flooded my brain this week and caused less than ideal sleep patterns.

The good news is, I usually need a night or two of feeling slightly 'ill-prepared' before I feel better about where I'm at.  I realize that no book or checklist can truly prepare me for what is to come in that hospital room.  I realize that it is completely out of my control as to when and how you decide to make your presence in this world.  I realize that even if I write the best checklist in the world, I will still forget something.  I just hope it's not my camera...

The truth is, I've never felt so 'unprepared' in my life, yet, I'm strikingly okay with that.  I actually welcome it.  The unknowns of motherhood and parenthood are sure to be an adventure, and I can already tell it is going to be the best ride of my life.  As for all of those 'unknowns' out there, I have the history of millions of women who have delivered babies in far less-appealing situations than I will have.  I have the support of a husband who's 'coming around' to the thoughts and images of a delivery room.  And, I have the faith of a Father, whose been in the driver's seat of this miracle I refer to as 'Baby J,' since January 30, 2010.  That's a lot riding on my side, I'd say ;)

So, as I search for the perfect valence for your room, and the perfect nightgown for my hospital stay, I continue to grow into these new shoes of mine.  No, they aren't the finest pair of Jimmy Choo stilettos, but I find myself fitting into them a little better every day.  

Love,

Your 'ill-prepared' momma      

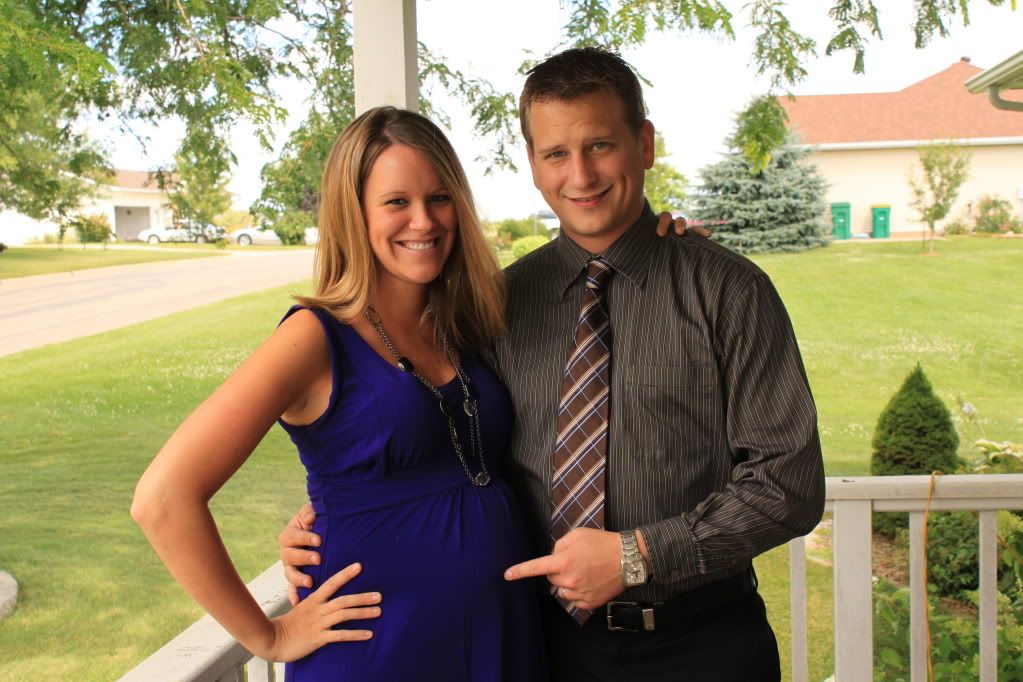
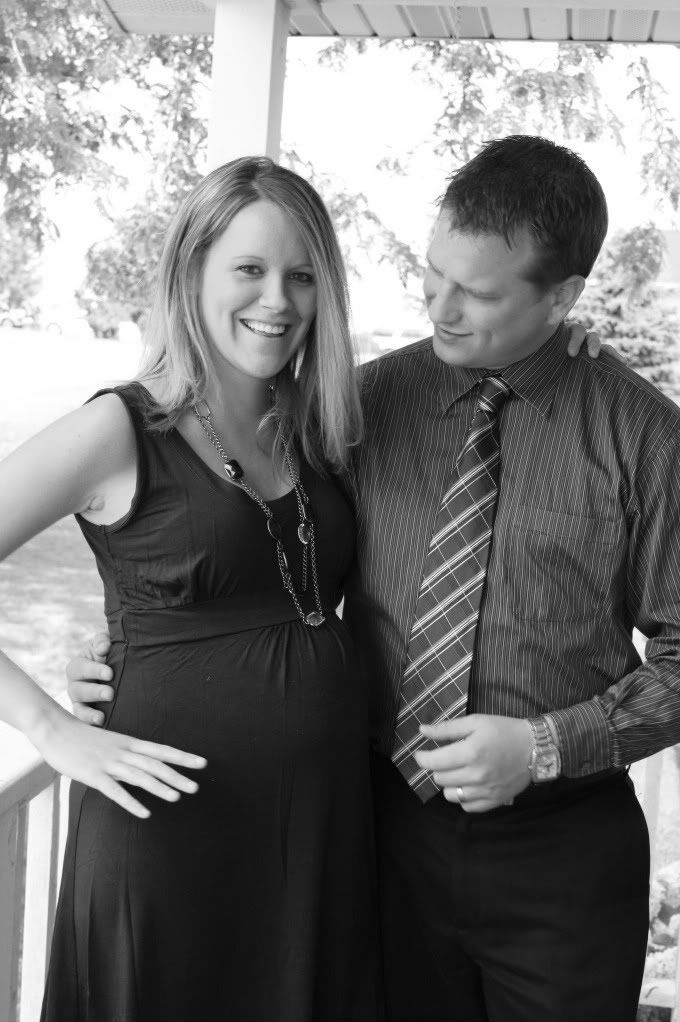
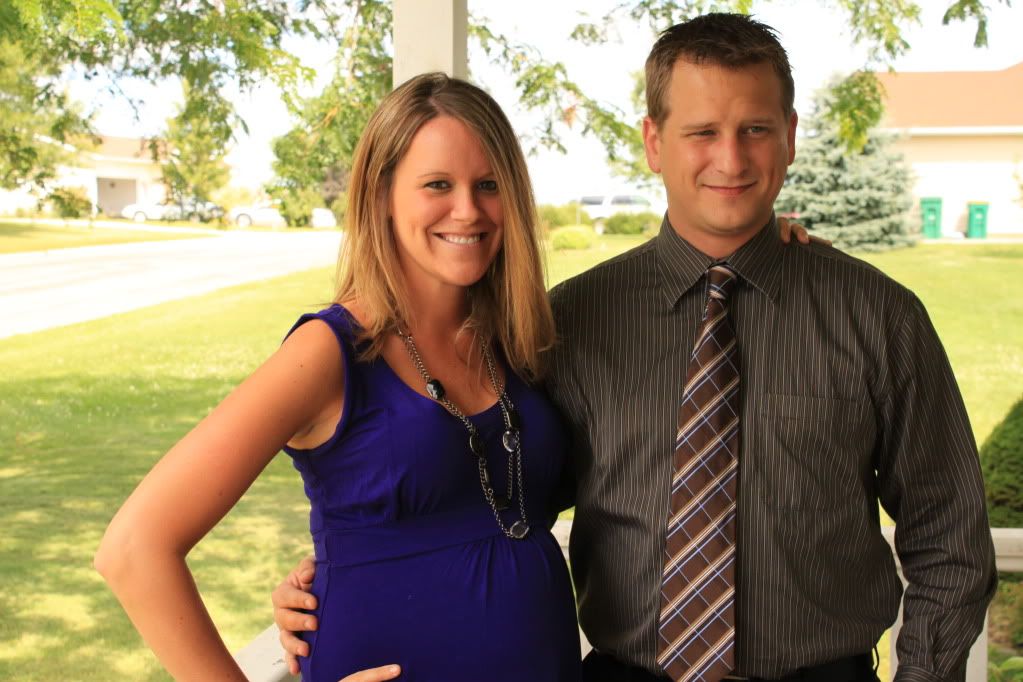
Either Beau is pointing you out in this picture, or pointing to my belly button, which is enjoying its last days of being an 'innie.'  

3-1

How far along? 31 Weeks

Maternity Clothes? Love my new Gap clothes. Getting worried about finding things to wear to school every day. Did I mention my classroom does not have air conditioning?!?!

Stretch Marks? No

Sleep? I heart my bed!

Cravings? Nothing too exotic this week. I shift from salty treats to sweet treats frequently though.

Best Moment This Week? A ‘small’ back-to-school shopping spree yesterday. Some maternity clothes, some nursery must-haves, and most importantly, some pretty cute items to add to Baby J’s closet!

Least Favorite Moment This Week? Going almost an entire day without feeling Baby J. I’ve heard as they get bigger, they get less mobile; however, yesterday was torturous! Needless to say, today he is making up for it! I currently have a foot stuck in my ribs!

Gender? BOY!

What I Look Forward To? A baby shower this weekend!

Weekly Wisdom? Walk. Every day.

Milestones? I can officially feel a foot. Before, I had no idea where this child was positioned or what body part I was feeling. After last week’s ultrasound, I can now confirm this hard little something constantly pushing on my ribs is a foot!

Family...

This weekend, my first cousin, Ryan, got married.  Ryan is the fifteenth cousin on my dad's side to tie the knot (if I counted right).  Not counting spouses, there are 18 total grandchildren, and now, more great-grandchildren than that.  My Grandma Henrichs, who still has a beauty shop in her house and still proceeds to give perms to a little society of old women in town, used to have a stocking for each of her kids, grandkids, and great-grandkids.  She also used to give each of us a bottle of shampoo as we packed into her little house each Christmas.  Needless to say, we've talked her out of the shampoo, and managed to convince her to move Christmas get-togethers to the local Amvet Hall.  As her flock continues to multiply, she still crochets a blanket for every new bride and every new baby!  Bless her heart and bless big families!

So this weekend, my family met at Mom and Dad's and took Charly to her first wedding.  Although I didn't have a baby to tend to during the wedding and reception, Baby J never let me miss his presence.  I mistakenly thought I could rock the heels, and by 10:30, my back had had enough.  Let's just say there was no chicken dancing for this lady!

Some pictures the familia...


Alternative Allergy Remedies

When I was growing up I struggled with my allergies a lot, from the runny nose, itchy eyes, and frequent sneezing and sinus infections- I had it all. I tried medication after medication to try and get some relief with no luck...until about two years ago that is. I took a few drastic steps to try and change this allergy problem and I'm so glad I did, because my symptoms have gone from a 10 to a 1! On top of this, I've reduced my allergy medication from 3 prescriptions to zero...my only allergy "medication" now is the use of my neti pot, which I'll tell you about more later. So let me tell you about some of the "alternative" steps I took to alleviating my allergy symptoms and how you might be able to try some of them out.

Here's what I did:

1. I got a skin-prick allergy test- This was covered by my health insurance, but still ended up costing me $150. They basically scratch the skin on your back in a number of places, insert common allergens, and then see how you react. Aside from wanting to itch the skin right off your back, it can be a good test to see what exactly it is you are allergic too. Here is what my back looked like after I got home from the test. See that massive knot dead-ahead, that's ragweed, my "highest" rating allergen, what a massive knot!


On the test  you can see they rank the allergens on a scale from 1 being a low reaction, and a 3 being the most reaction. Would you guess that my ragweed was a 6++! Crazy! Guess that's why the knot on my back is so big.

The downside of this test (other than the cost) was that the doctor wanted me to come back in a few weeks so she could prescribe me a ton of prescription allergy meds...um no thank you! That's what I was trying to get away from! Needless to say, I didn't go for the follow up appointment. In the end, this test was helpful to make me aware of what exactly I was allergic to, and it turned out to be pretty good proof of how beneficial the next 3 steps have been in relieving my allergies.

2. I got a food-sensitivity test and as a result removed gluten, yeast, cow's milk, and eggs from my diet completely...you can read more about this test and see my results by clicking here. Here's a pic of me saying good-bye to it all...mainly gluten.

Downside to this test, it's expensive in how it costs around $300. Positives to this test, finding out what food was making me sick! Isn't it hard to believe how one food can be healthy to one person, but harmful to another? I think this test finally gave my body a chance to rest and recover, as opposed to fighting a battle each meal as I ate foods that my body didn't agree with. Although this is an expensive option, I feel it would be worthwhile for everyone to find out what food they have sensitives to, so they can reduce the inflammation in their bodies...thus decreasing their allergies.

3. I went vegan-cut out meat, cheese, and butter (milk was already out). I think this step was really the nail in the coffin for me. Because even though I had already stopped eating most dairy, I still ate cheese. I guess I thought it was "safe"...WRONG! It seemed like every time I ate cheese, I had a runny nose and congestion the next day. One of the main reasons is because of casein...here's a quote I read in Gabriel Cousens book, There Is a Cure for Diabetes: The Tree of Life 21-Day+ Program that stopped me cold in my tracks from ever eating dairy or cheese again:" Research cited by Robert Cohen has made the point that there is up to a gallon of extra mucus in the body created as a result of drinking dairy. The mucus problem is associated with the fact that 87 percent of milk protein is casein, the main ingredient of Elmer's Glue." Yes, you read that right- Elmer's Glue! Gross- a pound of that in my body! You've gotta be kidding me! Goodbye cheese!

Downside: missing the flavor of regular cheese, but oh well, at least you won't be sneezing and dripping with mucus! I couldn't have made this transition without Daiya cheese...my favorite gluten-free, casein-free, lactose-free, vegan cheese! If you're interested, read more about some other easy vegan swaps here.

4. I began using a neti pot-you're going to think I'm crazy for this one, but it really worked for me! It's pretty simple, you put warm water in a little tea-pot looking thing and pour it up one nostril and it flows out the other, which cleans your nasal passages. You can find the one I bought here, but there are many others. Great prices too...mine was $7! Also, sometimes they sell special saline solutions, but I've had a lot of luck with just salt and warm water. Downside to this is that it might take you a few trys to get the positioning of your elbow, wrist, the actual pot itself right, but this won't take long.


Here's some of the benefits of neti pots (according to the flyer that came with mine):
-soothes dry nasal passages
-gently washes away dust, pollen, and environmental irritants like smoke and dust
-offsets the effects of breathing dry indoor or winter air
-removes excess mucus...naturally
-helps you breathe freer when practicing yoga or meditation.

Want to know how a neti pot works? Let me guide you through my "neti-routine" that I do twice a day: first thing in the morning and right before I go to bed.

1. Pour about 1 Tbs. Salt (I use sea salt) into a 1 cup measuring cup

2. Fill the measuring cup full with luke warm water- not too hot...it will burn, and not too cold...it will remind you of getting swimming pool water up your nose. Now pour 1/2 of the water/salt solution into the netipot.

3. Tilt your head and allow the tip of the neti pot to enter to your nostril. Relax and let the water flow through and out the other nostril...this took me a while to get used to but you just have to relax and truly "let it flow". Once the water is gone, blow your nose then repeat on the other side. Water may trickle out a tiny bit for a few minutes after you're done, just keep a tissue close by.

Update July 2012: Here's a video of how I use the neti pot.


So that pretty much sums up my allergy journey. Looking back, it's hard to believe I suffered for so long with allergy symptoms and paid so much money for prescriptions! I'm glad those days are over. If there's any one treatment I would recommend to get this whole thing going, it would be to get a neti pot and give that a try. It's cheap, easy, and effective. Yes, it's a bit embarrassing, but it's well worth it to be breathing easy! Next would be to go vegan...but I'm a little biased I guess! ( :

Keep in mind, I am not a doctor, I've learned all of this from reading books, researching the internet, and talking to doctors/natropaths...so although this all worked fine and well for me, it may not for you, so be sure to take your health into your own hands. Read some books, talk with some experts, search around for the appropriate care that fits YOUR needs, and don't stop until you feel better!

Do you guys have any alternative allergy remedies that have worked for you or that you have been wanting to try? Share your ideas here!

Oh Happy Week...

As summer slides away as quickly as a caught lightning bug in a tiny little fist, I find myself trying to hold onto every piece of it.  I've hit the time in every teacher's summer when I begin thinking about my classroom, my curriculum, and the dreaded bulletin boards, still plastered with the faded backdrop I failed to take off at the end of last year.  

The office will get cleaned.  The maternity plans will get done.  The bulletin boards...well...they'll probably get done.

But for now, it's about summer, baby.  A summer week with a lot to add to the Happiness Project. 

57.  A playful run through the sprinkler with my husband.  As the sprinkler drenched our thirsty front yard, Beau and I ran, stood, splashed, and drank in every drop of that moment.  There is something about a sprinkler that brings you right back to your childhood.  There is something about running through a sprinkler fully clothed on a Sunday afternoon while the neighbors peeked their heads around the corners of their homes that makes you feel a bit silly, a bit immature, a bit wonderful...

58.  A finished Master's Degree I can just about taste.  The paper is finished, my final class is days away from finished, and I am RELIEVED!

59.  Only in the summertime can I have a morning like today.  7:00 am.  Beau is unusually chipper (he is typically not a morning person).  Freezy pops for breakfast.  Weezer's, "El Scorcho," blaring in the kitchen.  Dancing (or what I like to call, 'gorilla dancing') in pajamas.  Stirring pizza sauce and shaking a bottle of red wine vinegar to the beat of the song.  Mornings like this don't happen very often.  When they do, it's best to bottle them up and save 'em for the all-to-familiar days of groggy mornings, rushed showers, and skipped breakfast.  I'll take El Scorcho any day...

60.  Holding sweet, sweaty babies with chubby toes in one hand, and eating homemade grilled pizza with the other.  Caramelized onions, pesto, and fresh mozzarella atop a grate of hot coals.  A sampler pack of Goose Island for the boys, Italian sodas for the girls.  Watching Charly girl roll over on her tummy, stretch her arms out, and show us her two new teeth.  Working hard to make her giggle, then finally succeeding by embarrassingly singing the 'crazy feet' song over and over AND OVER again.  Laughing at her innocent little smile as her Uncle Beau completely dishevels her hair.  One day Charly may get her retribution if her uncle's hair continues to take the path he thinks it will... 

61.  My new favorite purchase for baby.  I've been eyeing this thing for quite some time and finally scored a great deal after heckling the ladies at Peek-a-Boo.  If they'll sell it for half off because of a little rust stain, I guess I'll take it! 


Do you think this makes me a little nervous???


Yeah, Baby!

Dear Baby J,

Well, little man, today you made your mommy and daddy really proud.  Today was my 30 week appointment and a special one at that, as we were anticipating an ultrasound.  As you remember, we were told two weeks ago that you were measuring a little small and needed to 'beef' up.  I didn't mind the news because 1) I like to eat, and 2) we got an excuse to have another ultrasound!  So this morning, as I drove to pick your dad up on the way to the appointment, I was reminded of some of the same emotions I experienced before our 20 week appointment. 

Excited to see how you've changed...

Anxious to see lots of new growth and development...

and a little nervous to see something not-so-good. 

Just ten weeks ago, we found out you were a healthy little boy.  We watched you stretch your legs and move your arms, yawn, and drift of to sleep.  You were bony and a little mutant-looking, but active, healthy, and right on track.

In the ten weeks that followed, I feel like I've gotten to know you quite well.  I feel your bubbles and kicks, and know when you are sleepy and when you are crazy.  So today, as I watched you on that ultrasound screen, it was different.  Instead of a 'discovery,' it was more of a 'checking in' so to speak.  And, boy, are you looking good!

First of all, I couldn't believe how much room you filled up.  You still had room to move (and were taking full advantage of it), but your little body filled up the entire screen.  No longer are your arms so bony; they (and your little boy 'parts') have thankfully fell into better porportion with the rest of your body!  You weigh about 3.5 pounds and measure a little 'above average' on the growth charts (good news)!

Then the ultrasound tech. showed us the 4-D pictures of you.  We could see a perfect little glimpse of your face!  Instead of a teenage mutant ninja turtle, you look like a sweet, chubby little boy!  Oh man are you cute!  As I watched you blink your little eyes, I couldn't help but laugh and think about what exactly you are doing in there.  To me, you were just sitting contently, chillin', hanging out until the timer goes off.  

And, then, just like that, you'd had enough of the sweet baby face.  With one, simultaneous motion, you kicked my stomach!  The picture on the screen shook and the ultrasound tech. laughed as she felt it through her little controller on my stomach.  One giant, WHACK, and our ultrasound was over!  You're strong, that's for sure ;)  

We're on the home stretch now, little one.  You keep cooking in there and before we know it, I'll be touching those little cheeks instead of staring at them through a digital image screen.
  
And because you did so good at your appointment today, I decided to reward you with a little shopping trip to Von Maur.  The stores are getting fall stuff in...watch out world!


I love you! 

Mom.
     

30...30...30...30...30...30...30

How far along? 30 Weeks

Total Weight Gain/Loss? 15 pounds

Maternity Clothes? It may sound weird, but I kind of love maternity clothes. They're airy and comfy, and they accentuate my new favorite curve! I hit the Gap Maternity sale last week and scored big!

Stretch Marks? No

Sleep? Sleep is getting slightly more and more uncomfortable. I move from side to side sporadically all night long. And when I’m not jumping out of bed in the morning thanks to a killer leg cramp, I’m continuing my ‘fish roll.’ My pelvis is a little stiff in the mornings!

Cravings? Nothing crazy. I continue to eat a lot of fruits and veggies, and drink lots of chocolate milk.

Best Moment This Week? A super 30 week appointment today. I’m still smiling! Ultrasound was so much fun. Instead of the single pound little skeletore that greeted us at our 20 week appointment, we saw a three and a half pound, chubby, human-like baby boy! The 4-D pictures are amazing! I can’t stop staring at his sweet little face!

Least Favorite Moment This Week? A good week in my third tri-. No complaints!

Gender? BOY!

What I Look Forward To? Holding him for the first time. It takes my breath away a little…

Milestones? Baby J was deemed, “perfect” by the doctor today. I measured right on track, baby is a little above average as of size, due date is still accurate, and pelvic pain is completely ‘normal’ at this stage.


Good work, Baby! (I think it was the Chips Ahoys…)

I Need a Packing Intervention

I'd planned to post more pictures from The Mother of All Road Trips, and write something about our time in every city. But, I'm leaving Tuesday for RWA Nationals, and I have to start packing.

You'd think, maybe, since I just got back from a three-week trip, that I'd have a clue how to pack for six days in Orlando. I thought that, anyway. Until I started reading all the blogs on how and what to pack for Nationals.

Many conference veterans advise things like, "Pack one skirt, one pair of pants, and four tops that you can wear with either." Huh? My sister packs like this, but this is SO not me. I need choices. Who knows what mood I'll be in on any given day? Besides, we're going to be in ORLANDO, which is one big sauna in late July. I can't see myself wearing anything twice, but that's just me, and I have some well-documented neuroses.

Then there's the perennial travel advice, "Bring things you can wear during the day, the slip into evening by changing shoes and accessories." While this SOUNDS like common sense, my wardrobe simply does not lend itself to this strategy. You really can't just slip on pearls and heels with khaki pants, a lacy tank, and a sweater and call it evening wear.

My favorite advice was from the woman who advised taking only nude underwear because it works with everything. Okay--this advice I needed months ago, because I don't have time (or money) to shop for all new underwear between now and Tuesday. I guess I'll just have to try not to show mine.

But I really do need a new laptop case. And a "little black dress." Oh, and some Downy wrinkle release. Gotta go shopping. Maybe I should pick up that underwear while I'm out...

Peace, out...

Susan

Goodbye Paper Towels!

Hey everybody, time to say goodbye to one more product in your home...paper towels! Yes, I know what you're thinking, "I'm not using old rags and I'm not letting my house get dirty!" Just trust me here, I've got an idea for you! Let me tell you how I came to saying goodbye to paper towels. A few months back, when making the move to become more green, I looked at the way my hubby and I were using paper towels, and we (I) tried cutting back. Still, I felt some eco-guilt every time I bought more paper towels at the grocery store, even if they were the "green" Seventh Generation kind. On top of this, I was coming across information about how single-use paper product companies are clear cutting ancient trees and untouched forests...all for some paper towels and Kleenexes- really? What are we going to tell our grandchildren and great-grandchildren, "Oh sorry, there's no more trees left, we needed some paper towels."

Enough of my paper towel rant, time to move on to the solution! So after trying out a number of rags, towels, etc. I've finally found something that works! No, I didn't get it at Target, Wal-Mart, or CVS...I got it on Etsy! Not sure how many of you know about or use Etsy, but it's pretty awesome! You can buy or sell a number of handmade items that can't be found in stores, plus you get to talk to the person selling the product, which is great! The super cool and green product I found on there are "Un Paper Towels" by the seller, "Made in the Red Barn". Here's some facts about their un paper towels according to their Etsy site:

-made from a single layer of birdseye cotton fabric (Birdseye's unique weave makes it soft and very absorbent. Its' woven qualities also make it fast drying, durable and long lasting.)
-similar in size (Dimensions: 11-1/2" x 11-1/2"), shape and weight to paper towels
-made to wash and reuse.
-unpaper towels are kind to the budget AND eco-friendly

The cost of 24 Un Paper Towels is $23, which is the ones I purchased first. You can get as much as 48, or as little as 12. They even have some fun new colors you can choose from. It's up to you! Plus, there are tons of uses for these un paper towels! I use them: as Kleenex, for cleaning and dusting (see the pic at the top of the post), as napkins with meals, and I've even stuck a few in my car in case of smoothie spills!

So now that you've got your un paper towels, you're all set right? Not quite! The challenge is now where to put them? For a few weeks I tried balancing mine on the paper towel holder that was mounted under our kitchen cabinets. Unfortunately every time I wanted an un paper towel, I pulled and ended up with 20 more. Time for "Made in the Red Barn" to come in and save the day again with their "Towel Houses"!

These things are genius! It comes with two pieces: the tall base and a removable top. In the base there is a hole for you to pull the un paper towels through when you need one...and it's great because you only get one! These Towel Houses are very simple: all you have to do is take off the lid, drop clean un paper towels in, and pull them out of the hole when you need them! Here's some more info about them from their Etsy site:

-they are made from upcycled wood that has been stained and created to make a base and a lid
-you can just pluck just one towel at a time to avoid contamination of the others
-easily restock the un paper towels by placing the washed, UNFOLDED towels through the top of the dispenser and replacing the lid
-holds 18 un paper towels at a time
-Dimensions: 11-1/2" tall (excluding knob), 5-1/2" square at base
-comes in 25+ colors and styles, there are even a few smaller-sized towel houses (I chose the lime green because our kitchen colors are black, brown, and lime green... and we hardly had anything lime green!)
-cost: $33-39 per towel house
One of my favorite features of the towel house is how easy it makes the transition away from paper towels, because it gives you a system that works! Here's my towel house routine: place clean un paper towels into the Towel House, as I use them, I place them in a bucket right under my sink. When the bucket is full, I wash them with my laundry. After doing laundry, I drop the un paper towels right back in the towel house and use them again! So easy! So long paper towels, you're not coming back into this house!
I hope this gives you all some ideas as to how you can begin saying goodbye to paper towels and hello to un paper towels and towel houses! You won't be disappointed! ( :

Goodbye Plastic Straws!

For all my smoothie-loving friends out there, here's a post you might appreciate. When I first started making smoothies, I was going through at least one plastic straw a day, and since I started feeling some eco-guilt about that I decided to try reusing the straws. This worked fine for awhile, except for those days I would forget to clean the straw out...not fun! On top of this, I was started to learn some unsettling things about plastic, so even though I was drinking some awesome, organic goodness with my smoothie- I got worried that the object I was using to drink it with might not be so healthy!


Then I saw on some vegan/green blogs people were talking about glass straws...I was super excited to try one! So when my husband got me one (actually two-score!) for Christmas last year I was pretty pumped to use them! I "requested" these from the website Strawesome.com , which has specific smoothie straws, as well as a bead on the straw to keep them from rolling off tables or counters. Here is one of the straws to the right, soaking up some green smoothie goodness! So long plastic straws, it's time for glass!
Here's some info about glass straws:
-they are made from borosilicate glass tubing, the same glass that Pyrex® is made from
-since they are glass, they will not be leaching any chemicals or toxins into your drinks, no matter if they are hot or cold
-they can easily be washed and reused over and over again
-they save tons of plastic from entering the landfill
-they could also be a small savings, since you won't have to keep buying plastic, one-time use straws


Now you know why glass straws are awesome! Let me tell you about my two favorite brands. The first is Strawesome.com, as I mentioned before. They run about $10-14, they have some cool designs and colors, and they offer a lifetime guarantee...so if your straw breaks you can send it back to them for a free replacement (a must have for glass straws)!


My second favorite company is The Glass Dharma. I discovered this company after the two straws I had from Strawesome broke...(unfortunately those two only lasted about 5 months, and at the time I didn't realize they had a lifetime guarantee, oh well!). Anyways, in searching for new straws I found this new company and I figured I would try out their straws, so I bought one of their "Beautiful Bends" straws in the size: 12mm x 9". (You can see it to the right and below.) This specific straw costs $9.50. Other straws at this website run for about $6-12. Their straws are not so fancy with all the different designs or colors like Strawesome has, but they seem to be of high quality (no breakage yet in 2-3 months, I'm also being more careful!), and their prices are a little cheaper. Last bonus...they also have a lifetime guarantee, so if one of their straws breaks, you can send it back for a replacement.


 Last tip, they often sell special cleaning brushes for the glass straws, and I haven't tried those yet, but a good alternative to help you clean them is to use an old plastic straw (I have 2 I've saved from my pre-glass days) and I just slide those right inside the glass straws and scrub them with some soap and water. Seems to get the job done, and it puts those old plastic straws to use!

Well, I hope this has helped you learn some ways you could say goodbye to plastic straws and hello to healthy, more environmentally friendly glass straws. It's all about one step at a time, right? I think it's time for a smoothie...with glass straw of course! ( :

Still No Quilts ;-)

I keep waiting until I have a quilt to show before I post, but realized that I haven't posted in month!! I have been working on a little doll quilt for a giveaway, but still making dolls all the time!
I need to make one to keep for myself......I am starting to really love these little guys!
I hope everyone is doing well and keeping cool!
Take care,
Cathy

Things I Learned on the Road Trip

Here are a few things I learned on our recent odyssey:

  1. My mom will dance on Beale Street (literally ON the street--she would not go into the clubs) and have her picture made with the large rooster outside The Red Rooster bar. This caused my reality to bend a little.
  2. The Mississippi River isn't all that wide in Memphis. I've always imagined it as a mile-wide river the whole length of the thing, but it's not. It's a mile wide in places.Someplace in Minnesota it's nearly 11 miles wide, but in spots, it's only about 20 feet wide! I'm sure I must have learned this in school, but so much has fallen out of my brain over the years. I've flown over the Mississippi many times, but had never seen it from the ground. Crossing it in Memphis and again in St. Louis on the way back was very cool.
  3. Graceland isn't as large as you might think. (My dad had to go there.)
  4. Oklahoma City is quite lovely. I'd picture all of Oklahoma like the black-and-white parts of Kansas from The Wizard of Oz. (We were in Oklahoma City the day of the flooding, and that was scary. We nearly had to swim out.
  5. We visited 18 states in three weeks. Every one of them was beautiful, and watching the landscape change gradually from mountain to plains to desert and back to mountains is fascinating. I thought I would sleep in the car, as we drove about 8 hours every day on the way to California and back. I never closed my eyes.
More later. I learned a lot on this trip. I'll never forget it, both for all the beautiful country we saw, and for the gift of three uninterrupted weeks spent with Jim. This was the most consecutive time we've seen each other in the errr... some years we've been married. It was wonderful.

Also a very special gift was spending the time with my parents while they are still young and active and loving life. Here's to you, Wayne and Claudette!

Peace, out...

Susan

Goodbye Teflon!

Hey everybody, time to get a little Erin Brockovich here as I talk about Teflon. Pretty great right, non-stick cookware-what could be bad about that? Well, in some of the "green books" I've been reading, I keep coming across information about some dangers that are lurking in these "non-stick pans". One of the dangers is something called: PTFE (or in science world: polytetrafluoroetheylene) this is the synthetic chemical used to give pans their non-stick coating, primarily found in Teflon. A little acronym I made up to help me remember PTFE is Pans That Fume Everywhere! As if the name doesn't sound toxic enough, the dangerous part seems to come from the fumes released as the pans are heated to high temperatures (which usually happens when they're used for cooking!). Another toxic buddy in these Teflon pans is: PFOA, (or in the science world: perfluoroctanoic acid), this is another chemical used in the manufacturing process of making non-stick, stain-resistant surfaces.

This toxic party keeps going from here in how studies have found that the fumes from PTFE can kill pet birds and cause flu-like symptoms in humans (called, "Teflon Flu"). On top of that PFOA can cause cancer, liver damage, growth defects, as well as impairing the immune system. Pretty crazy right?! I don't know about you, but I watch what I eat, take my vitamins, and exercise all so I can stay healthy, the last thing I need is for my pots and pans to be making me sick! Now I don't have any pet birds, but what about my pet dogs? Could it affect them? I'm not sure. I know this sounds kind of far-fetched, but the science is out there, click here to read more from the Environmental Working Group, a non-profit organization dedicated to educating consumers on a variety of health and environmental issues. Another resource can be found here at Healthy Child Healthy World, another non-profit organization, about the dangers of PFOA.

So now that we know the scary facts about non-stick cookware, what can you do about it?

1. If you've got no way to replace the pots and pans, you could take precautions like keeping your cooking temps low, using your exhaust fan, and keeping pet birds, if you have them, out of the kitchen.

2. You could gradually replace one or two non-stick cookware pieces at a time. This is what I did, because as you can see to the right, we had this one big ol' skillet pan that we used for tons of stuff, but you can see the scratches in the non-stick coating...yikes! TOXIC! This pan was the first to go, out with the Teflon, in with the cast iron!

Cast iron is an amazing multi-purpose pan! It's been around for ages and when purchased, will last for many years to come. I was a little scared about using cast iron in the beginning, because it was different from pans I've used in the past. But now I love it! We use it for everything from stir-frys (see below), to pancakes, and even veggie burgers, which my hubby is cooking on it right now- yum!
Here's some info about it: For starters, the cast iron pan is heavy- but you get used to it, and it can double for a quick little arm workout! Next, don't get too worried about the talk of "seasoning" that is usually mentioned when using these pans. It's simple, buy a cast-iron pan that is pre-seasoned and after you're done cooking and cleaning it, just add a little oil to it too keep it "seasoned". Last, be sure never to use soap on your cast iron when cleaning because it will mess up the "seasoning". I just use water and a dish scrubbing brush.

Did you know one more benefit of cast iron, aside from NOT being TOXIC, is that it can add trace amounts of iron to your diet, which is never a bad thing for a vegan like myself! I got my cast iron pan from Bed, Bath, and Beyond for about $25 (it was the Emeril kind), but here's a good one on Amazon.com as well for $18.

3. Next step, continue to gradually replace other pots and pans if you can. See to the left that lovely box of shiny pots and pans, well, I've had my eye on it for quite a while at Wal-Mart, and I finally broke down and bought it. Why did I want it so much you ask? Because it's stainless steel, pretty much the only other "safe" type of pan out there, other than cast iron. This 10 pc. set cost about $90 or so, (here is a similar one on Amazon.com) and I'm so glad I got it because I was able to clear out the rest of my Teflon-coated pans and now I don't have to worry about what's leaching into the food I'm cooking!


Here's my box of old pots and pans...so long Teflon! I'm not going to miss you! Alright, alright time for me to get off my soap box about Teflon! Do you guys have any other alternative pots or pans that you use instead of Teflon? I'm looking into getting a wok next, but it will definitely be Teflon-free one! Let me know your thoughts!

The Mother of All Road Trips

The Husband, (aka Jim, aka Sugar) and I just got home late Saturday from a three-week road trip from our home in Greenville, SC to San Francisco, then Napa. We took my parents. For their 50th wedding anniversary. (Note: Yes, they had me VERY late in life. I was a miracle baby, in fact.)

I'd told Mom and Dad not to worry about how much they packed--"take whatever you need," I said. They took me at my word. I myself am not a light packer, and I think it's safe to say that the result was that we hauled more stuff to California than your average family moving west in a wagon train.

So, it took a while to pack and unpack all that stuff, and I've been unplugged for a while. I'm catching up on email and laundry. Planning to drag myself in to Jazzercise today so The Queen of Pain can start working some of what I ate off my derriere.

Trip highlights are too may to count, but coming soon.

And, my dad was well behaved. He didn't show his tongue to a single soul, though he looked at it in the visor mirror a lot when he was riding up front.

Peace, out...

Susan

Making Your Own Almond Milk

So after watching the movie, No Impact Man, (see more about it here on my "Green Movies" page) I was inspired to look more deeply into my daily routine and see what ways I could go "more green". Food packaging came to mind, because although I've gone green with storing food by using reusable bags, glass containers, etc. I still buy food that has been packaged with plastic, paper, cardboard, and oh yeah...more plastic. So I started thinking, I wonder what I buy that I could just make at home? Almond milk!

Because of my cow's milk allergy, I've tried many dairy-free milks over the years, and I'd finally found almond milk to be my favorite with low calories, low sugar, and free of gluten and animal products. I had read about making it from scratch in some raw food and vegan recipe books a while back, and now I was ready to give it a try. After the first batch, I was addicted! It tastes fresher and more creamy to me, plus I avoid the packaging and high cost of expensive almond milk! Yes, it does take a bit more time to make it by hand, but I try to do it on the weekends so I'm stocked up for the week. Also, it kind of teaches you to slow down a bit and relax, which I could always use a bit more of ! ( :

So, if you feel like dairy-free milk a try, instead of buying it at the store, try out this recipe:

1. Night before: Take 1 1/2 cups of raw almonds * and put them in a bowl. Fill the bowl with water so the almonds are covered, now cover the bowl (I just put another bowl on top) and soak for 8 hours. I usually just do this before I go to bed so I don't even have to think about it. (*use raw almonds if possible...there's controversy over this because what is labeled as "raw" has actually been pasteurized so it's technically not raw. I don't stress out too much about it, I just avoid the ones that have been flavored or roasted, so if the raw I buy isn't 100% raw, I don't worry about it too much.)
2. Strain and rinse the almonds that have been soaking. Then add to the blender. 3. Add 3-4 Medjool dates with the pits removed, to sweeten it up
4. Add 1 tsp. or more vanilla extract if you would like a vanilla flavor...add your own flavors or leave it plain if you would like.
5. Add about 1 1/4 cups of water in with the almonds and other ingredients...then after you blend everything in there, add 1 more cup of water.
6. Mix all the ingredients up in your blender until it's smooth and you can't see any big chunks.
7. Break out your "nut milk bag"! This will help you strain away the almond pulp from the actual milk. Some people like to just leave the pulp all in the mix, but I like it a little smoother so this is what I use. You can find a "nut milk bag" here on Amazon.com for $12. When you're done with it, you can just rinse it out, hang it to dry and then use it again. Love my "nut milk bag"! I just have to make sure I don't squeeze too hard sometimes or it will rip the seams...be gentle just slow it down and relax. LOL ( :
8. Time to "milk" your almonds! This part cracks me up because it feels like you're milking a cow...but you're definitely not! He he! So, in this pic I probably put all the milk in the nut milk bag, but sometimes I break it up into two halves, so I'll squeeze the first part, then clear out the almond pulp, then I'll squeeze the second half of the milk and then be finished. *Also, word from the wise, put your bowl in the sink while "milking". Since taking this picture, I've found it keeps the counter a little cleaner if you put the bowl in the sink.
This is the almond pulp that will be left in your "nut milk bag" it's the almond pulp. Haven't found any good uses for it yet, mainly because it's extremely dry after you squeeze all the moisture out of it! Throw it away or compost it. 9. Here's comes the "Funnel Fun"...pour the milk from the bowl into a jar. Thank goodness for this cheap little funnel, it cost me less than a buck and it does a great job of keeping me from spilling all this milk onto the counter! Also, I like to use glass mason jars because I know I can close them up and my milk will stay fresh and sealed.
10. Now your homemade vanilla almond milk is done! You'll probably want to wait at least 2 hours or so to use it, so it will be cold, but you can have it immediately if you like. Be sure to keep it refrigerated, and shake it before you pour it, since it will separate out a bit between uses! Well, I hope you enjoy the almond milk! It should keep about a week or so in your fridge. Do you have any other favorite non-dairy milks that you buy or make? Please post below! ( :