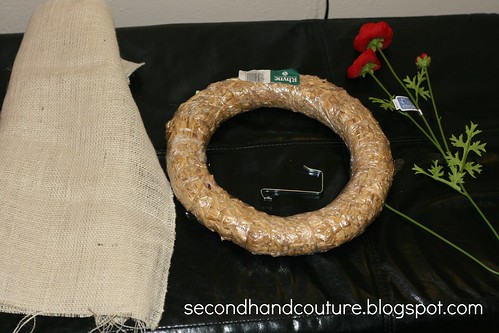
I've been drooling over the wreaths that I've seen on different blogs and on Pinterest. However, being the ridiculously frugal individual I am, I've hesitated to buy or make one. My sister found me a wreath at Salvation Army for $.44, so I decided the time had finally come to join the wreath club!
I went to Joanns and bought half a year of burlap fabric for around $2 and some red flowers for $2 also. I found an old door hanger around our house to use to hang it on the door.
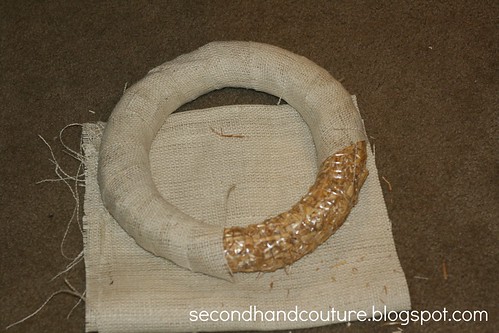
I started off by cutting long strips of burlap and wrapping them around the wreath. I hotglued them at the beginning and end of each strip to keep them in place. This part was ridiculously messy! But that's what vacuum cleaners are for, right?
When the wreath was fully covered, I made a few burlap "flowers" out of the extra fabric. Basically, I just wrapped a long strip of burlap up, cut it to add some definition, and hotglued it. Then I arranged the red flowers and burlap flowers along the bottom of the wreath and glued them into place.
I used some burlap to make a loop around the wreath so it could be hung easily.


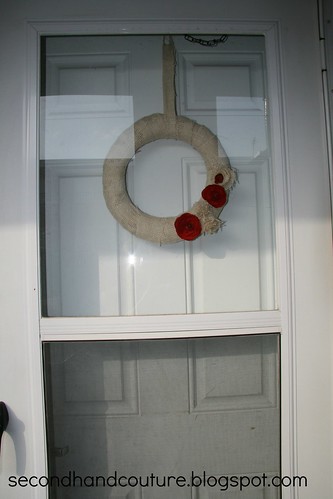

I love the wreath because while it's perfect for fall, it can still easily transition into the winter and Christmas season. Plus, I spent under $5 for the entire project. Cheap, versatile, and classy? I count this wreath a win.