Several people want to make their whirlygig quilt with scraps and make bigger blocks. Here are directions to make one that is 10". I did end up trimming the edges, because I was hurrying to get it cut out and may not have been as accurate as I could be.
Cut out your background fabric into 5 1/2 by 6" rectangles. Place your rectangle using your cutting mat as a guide with the long sides on the top and bottom. Come in 2 1/2 " from left to right on the top and make a small mark. Come in 2 1/2 " right to left on the bottom and again mark. Using your ruler cut up diagonally from mark to mark.
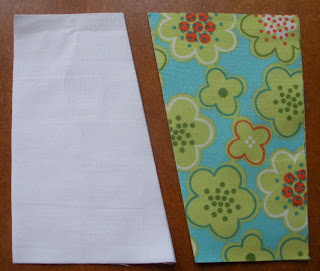 Do the same for your print rectangles, being very careful when you first cut them out to make sure that all fabric is right side up. Yes, I did it again and it makes half of your whirlygigs go in the wrong direction. You could get sort of seasick with them going all wonky. ;-)
 Do the same for your print rectangles, being very careful when you first cut them out to make sure that all fabric is right side up. Yes, I did it again and it makes half of your whirlygigs go in the wrong direction. You could get sort of seasick with them going all wonky. ;-)
Place them beside your sewing machine exactly as you will sew them. The pictures from the charm square tutorial show how to line them up accurately before you sew. Press to the print side and sew the 2 top squares together and then the bottom two. Place the 2 sides together lining up with the middle seam and sew. Press to one side. Trim up if you have little bits coming out.
 Here is the "big boy" one beside the charmed one.
 Please upload pictures for all of us to drool over, um I mean see!
 Here is the "big boy" one beside the charmed one.
 Please upload pictures for all of us to drool over, um I mean see!
I am running to JoAnn's with my daughter so please let me know if I have left anything out or not been clear.
Thank you again,
Cathy